Redux is one of the awesome tools out there for the React ecosystem. It designed to work with React's component model. You define how to extract the values your component needs from Redux, and your component receives them as props.
Cool right 😎. But it’s not easy to pick up, especially for beginners. 😫
TLDR;
We can sort of recreate Redux in our React app without actually installing redux and react-redux 🚀. React Context API and Hooks came to rescue 🔥.
But how ?? I will attempt to show you how in this article 🙌
Before we start
This project might be long, but worth it if you spend a little bit of time to follow through this awesome😎 project. I came from the future👽 to save you from Redux purgatory😁

What we're building 🧩
A tiny app that you can Fire up 🔥 your favorite "The Simpsons" episodes.

This isn’t a tutorial on CSS so we won’t focus much on styling. The full final project is here on Codesandbox, feel free to reference it if you get lost.
The Setup 🛠
note: Make sure you have installed NodeJs on your machine(mine is 12.8.3)
$ npx create-react-app without-redux
You need to wait for a minute, or maybe an hour 😂.
- Once it’s done, start it by running
$ npm startin the without-redux directory.
You will see this(if all goes well):

- Stop the app running by pressing ctrl + c.
Ok, lets delete some noisy file
Delete files from src/ App.css, App.test.js, logo.svg, and serviceWorker.js.
In our index.js and remove line 3, 5, and everything below line 8.
Rename App.js to App.jsx. Delete everything and replace it with this:
import React from 'react';

export default function App() {
  return (
    <React.Fragment>
      <div>
        <h1>The Simpsons</h1>
        <p>Fire🔥 your favourite episodes</p>
      </div>
    </React.Fragment>
  );
}
The Redux principles 💆♂️
According to its documentation Redux can be described in three fundamental principles, stores, actions, and reducers.
1- An action is the only thing that should trigger a state change. It typically returns an object with a type and a payload.
function FireUp(dispatch) {
  return dispatch({
      type: 'ADD_FIRE',
      payload: episode
  })
}
The dispatch(or send) argument here tells the action what store this reducer the object needs to affect as an application can have multiple reducers. This will make sense later on. 😉
2- A reducer specifies what part of the store will be affected by the action. Because redux stores are immutable, reducers return a new store that replaces the current one. Reducers are typically written as switch statements.
function reducer(state, action) {
  switch (action.type) {
    case 'ADD_FAV':
      return {
        ...state,
        favourites: [...state.favourites, action.payload]
      };
    default:
      return state;
  }
}
3- The store holds all the application data in an object tree. Redux has one store but other state managers like Facebook’s Flux, can have multiple stores. If you’re familiar with React think of the store as a state, but for the whole application.
const initialState = {
  episodes: [],
  favourites: []
};
4- Our component or any component in our application has access to the store and can change the store by triggering an action.
Now let’s see these principles in action.
Creating Our Store 🏭
- Create a new file in
src/called Store.js
Here we’re going to use React Context to create a parent component that will give it’s child components access to the data it holds(like we wrap up 🍔 our component). Essentially it has a provider-consumer relationship. The provider 🐦 has all the data and the consumer 🐣 consumes it.
- Add the following code to your Store.js file
import React, { createContext } from 'react'

export const Store = createContext();

const initialState = {}

function reducer() {}

export function StoreProvider(props) {}
Line 3 creates our context object which children components will subscribe to. For now, let’s skip the inisitalState object and reducer function and go to StoreProvider.
This will be the react component that will encapsulate 🍔 the other components in the application. It has an argument of props because that’s how we’ll get access to the other child components.
- Add this code to the StoreProvider function:
export function StoreProvider(props) {
  return <Store.Provider value='data from store'>{props.children}
  </Store.Provider>
}
- Now go to your index.js file and import StoreProvider from
./Store
import { StoreProvider } from './Store';
- Still in index.js, wrap 🍔 your
<App />component in<StoreProvider>, your code should look like this:
ReactDOM.render(
  <StoreProvider>
    <App />
  </StoreProvider>,
  document.getElementById('root')
);
Awesome 😎
- In your App.jsx file import, your Store context below the React import.
import { Store } from './Store';
- On the first line inside the App function, add
const store = useContext(Store);
- Don't forget to import useContext from React at the top
import React, { useContext } from 'react'
We’re using our first hook here, the useContext one. This will give the component access to the data in the value of our context provider.
On the first line inside
<React.Fragment>add{console.log(store)}Now when you run the app(
npm start) and look in the dev tools inspector, you should see some data from your store.

note: Don't worry if you lost, I get you 😁
This is the structure of file and code for now
// index.js

import React from 'react';
import ReactDOM from 'react-dom';
import App from './App';
import { StoreProvider } from './Store';

ReactDOM.render(
  <StoreProvider>
    <App />
  </StoreProvider>,
  document.getElementById('root')
);


// Store.js

import React, { createContext } from 'react';

export const Store = createContext();

const initialState = {};

function reducer() {}

export function StoreProvider(props) {
  return <Store.Provider value='data from store'>{props.children}</Store.Provider>;
}


// App.jsx

import React, { useContext } from 'react';
import { Store } from './Store';

export default function App() {
  const store = useContext(Store);

  return (
    <React.Fragment>
      {console.log(store)}
      <div>
        <h1>The SimpSons</h1>
        <p>Fire🔥 your favourite episodes</p>
      </div>
    </React.Fragment>
  );
}
Creating our Reducer 💪
- In our Store.js file add this code to your empty initialState object
const initialState = {
  episodes: [],
  favourites: []
};
This is what our initial store will look like before any new bits of data are added.
- Change the reducer function to look like this
function reducer(state, action) {
  switch (action.type) {
    case 'FETCH_DATA':
      return {
          ...state,
          episodes: action.payload
      };
    default:
      return state;
  }
}
The reducer function as seen previously takes two✌️ arguments,
- state — the data in the store(in our case, initialStore) at the time it’s run, and
- action — the action object that is returned.
Currently, our reducer has one case, ‘FETCH_DATA’ which will replace our episodes array with the data that is passed back. The default keyword returning state is needed just in case an invalid action is dispatched.
- In our StoreProvider function, add these lines above the return keyword
const [state, dispatch] = useReducer(reducer, initialState);

const value = { state, dispatch };
note: Don't foget to import useReducer on the top
We’re using our second hook, the useReducer one. This takes two arguments, our reducer, and our intialState. It returns to us an array with
- state — the data in the store, and
- dispatch — how we dispatch an action to our reducer (and in turn change our state). I hope this is making sense. Feel free to refer to the redux principles diagram which should help.
We then turn our new state and dispatch variables into an object and assign it to a variable called value inl ine 2. Essentially value is the same as
const value = {
  state: state,
  dispatch: dispatch
}
Alright
- In the Store.Provider replace the
value='data from store'attribute with
value={value}
Now we can pass our state and dispatch to our child component.
Go to your App.jsx file and change const store = useContext(Store) to
const { state, dispatch } = useContext(Store);
- Now update the store in the console log to state and take a look at the console on DevTool.
{console.log(state)}

You should see it’s pulling our initialState data from Store.jsx. Now let’s work on putting some data in there.
Creating Our Action ✊
The final piece to our redux puzzle.👾
- In our App.jsx file, right before the return keyword create an anonymous async function and call it fetchDataAction
const fetchDataAction = async () => {}
We’re going to use the fetch api to get data from the tvmaze api using async/await.
- Add the following code to our new fetchDataAction function
const fetchDataAction = async () => {
    const data = await fetch('https://api.tvmaze.com/singlesearch/shows?q=the-simpsons&embed=episodes#');
    const dataJSON = await data.json();
    return dispatch({
      type: 'FETCH_DATA',
      payload: dataJSON._embedded.episodes
    });
  };
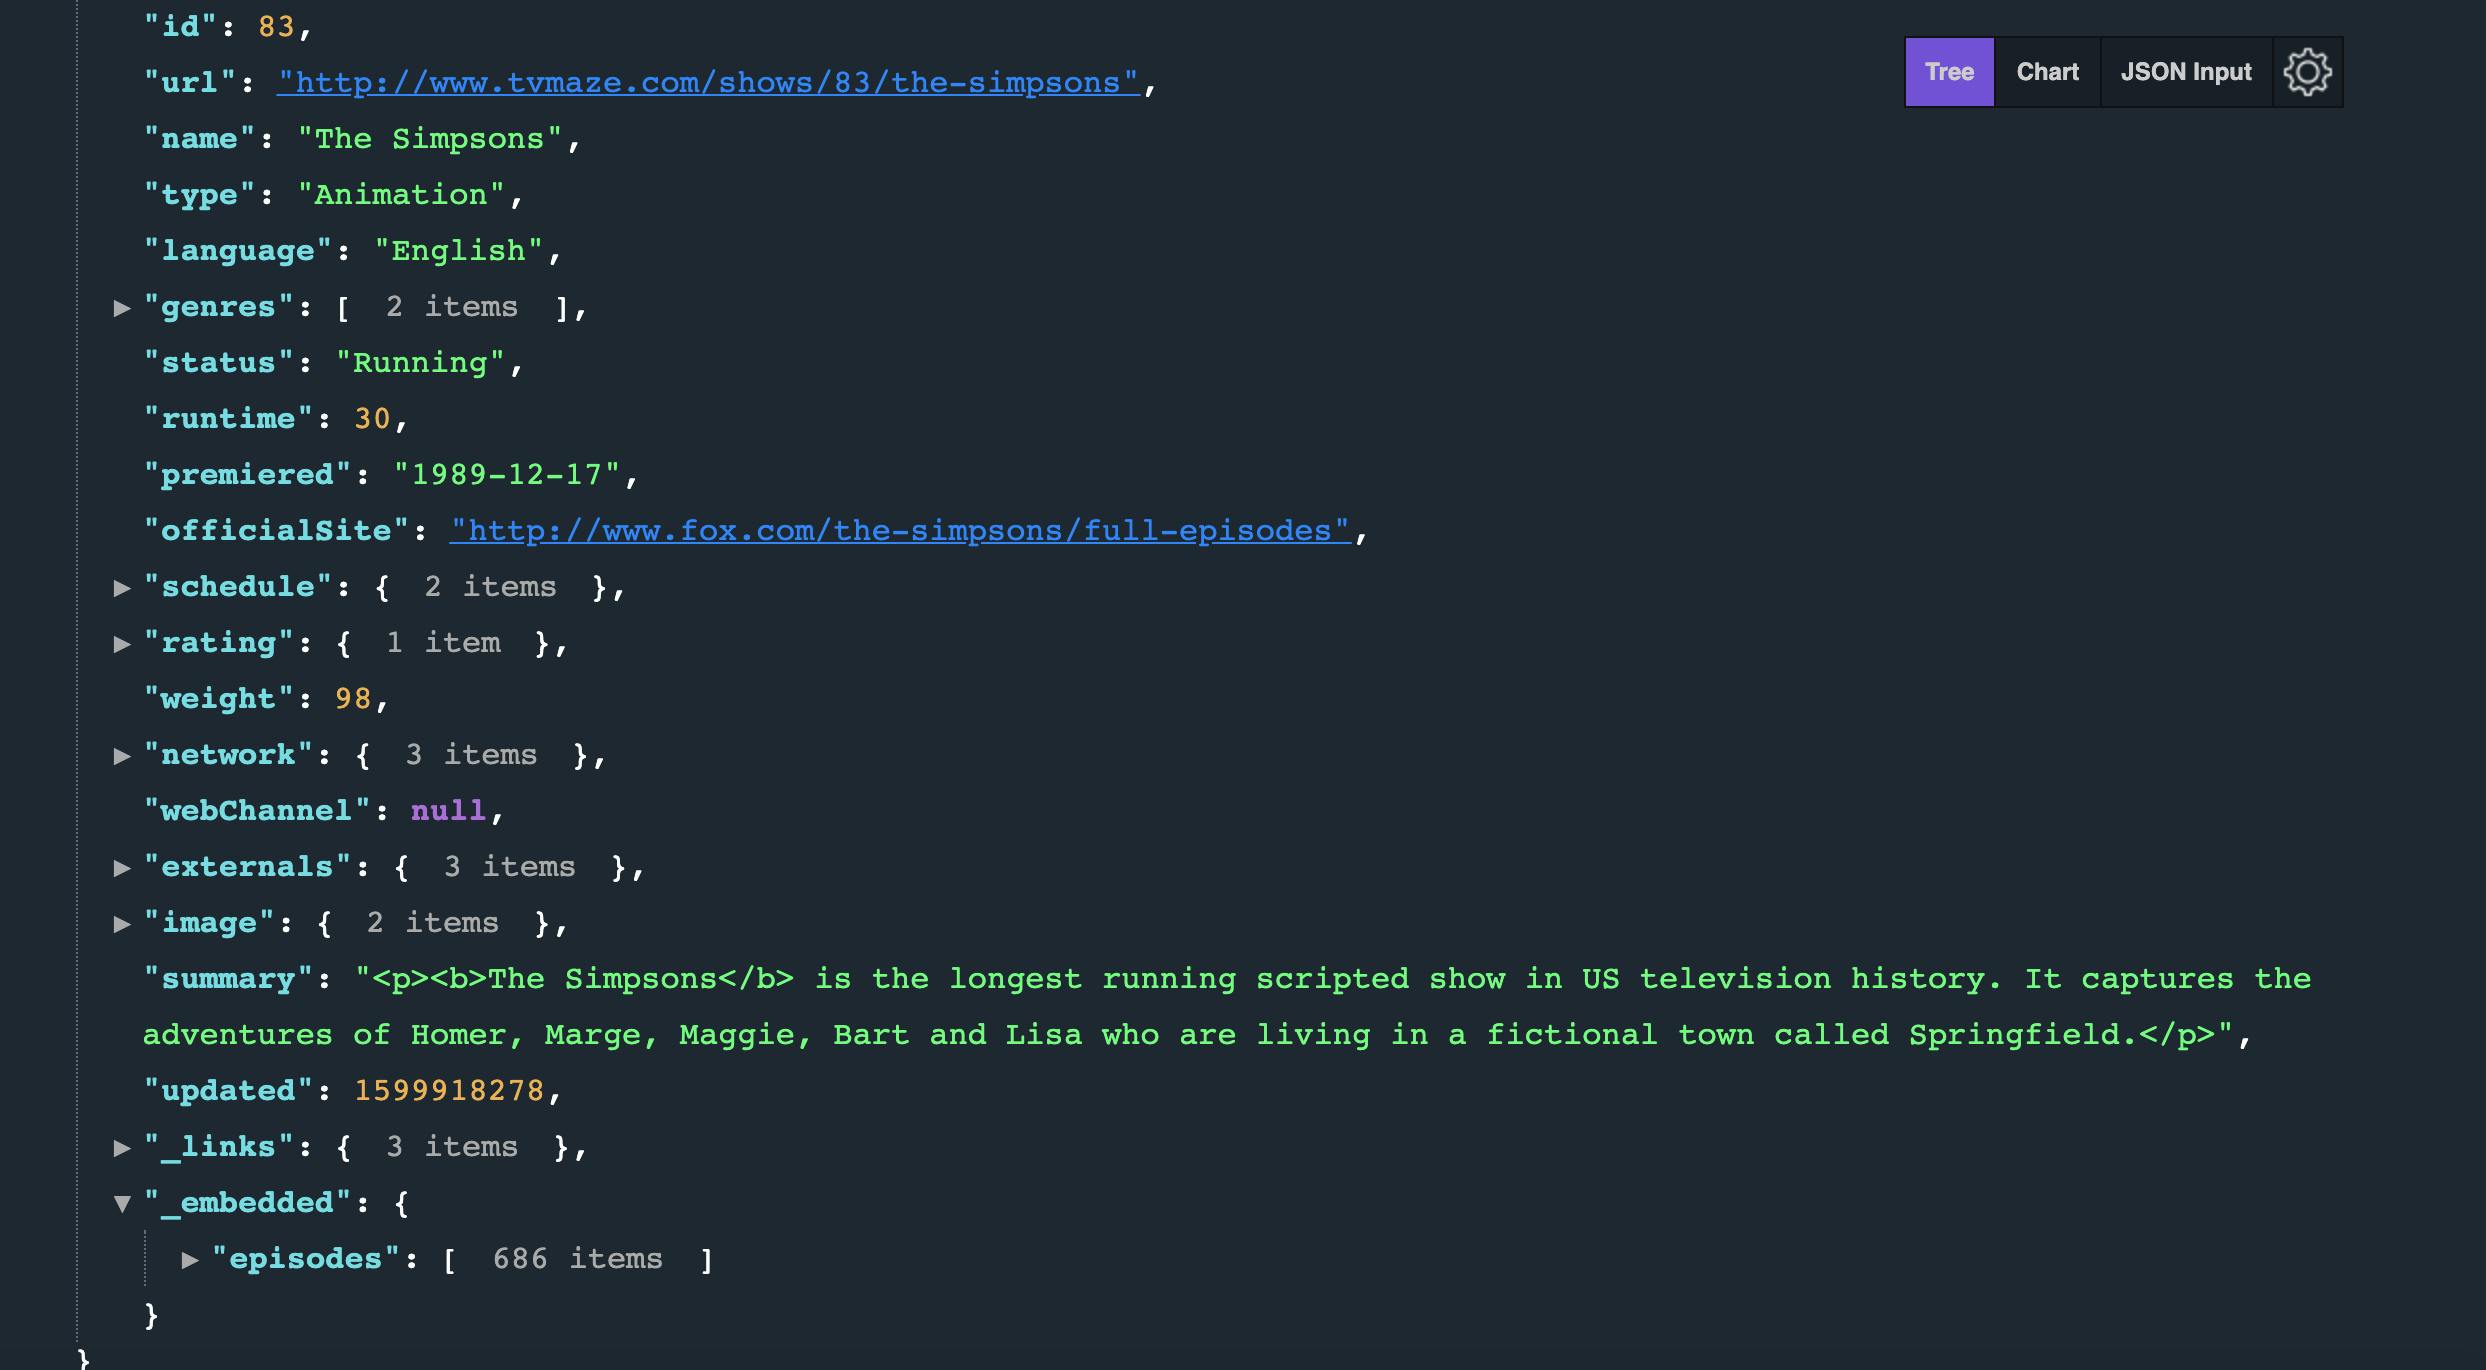
I encourage you to go to the api url in your browser and see the data. The list of episodes is under _embedded that why line 6 looks the way it does.

note: I'm using Awesome JSON Viewer Chrome Extension
- We want to run fetchDataAction each time the page loads so let’s put it in a useEffect hook above our return keyword.
useEffect(() => {
  state.episodes.length === 0 && fetchDataAction();
});
note: Don't forget to import useEffect on the top
The above code is similar to componentDidMount. Basically then the app loads, if state.episodes is empty (which it is by default), then run fetchDataAction.
- Save, and refresh the page. Look in the dev tools console and you should see some data.

And that’s the redux pattern in a nutshell. Something triggers an action (in our case it’s a page load(useEffect) ), the action runs a case in the reducer which in turn updates the store. Now let’s make use of that data.
- In our App.jsx file add this code below
<p>Fire🔥 your favourite episodes</p>
<section>
          {state.episodes.map(episode => {
            return (
              <section key={episode.id}>
                <img
                  src={episode.image?.medium}
                  alt={`The Simpsons ${episode.name}`}
                />
                <div>{episode.name}</div>
                <section>
                  <div>
                    Season: {episode.season} Number: {episode.number}
                  </div>
                </section>
              </section>
            );
          })}
</section>
This code essentially loops over the objects in our episodes array (after it has been populated with data from the API), and populate the DOM with this data.
- Save and you should see some episodes in your browser. 🚀
Let’s take a break… 😋
At the risk of this tutorial getting too long, I think we will stop here. The application isn’t quite finished yet but from here on it’s more of the same. More actions, a big reducer, and some use of React lazy and suspense.
If you wanna get the result same as this👇

Then, go to Part 2 where we add some styling and refactor our code.
Take a break 🌭 for 5 minutes and Lets we finished our Project 🔥
Go to Part 2 →
